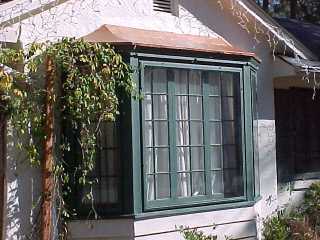
Roofs over dormers or bay windows could be lovely accents in the appearance of your home. The metal areas are relatively small, but quite visible as you approach your place. Therefore the cost and time could be minimal to achieve an attractive result. And painting copper offers a possibility to change an aging roof surface to something eye-catching
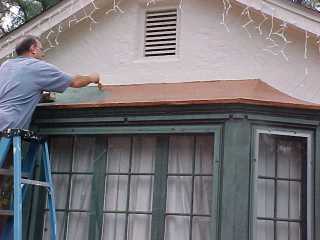
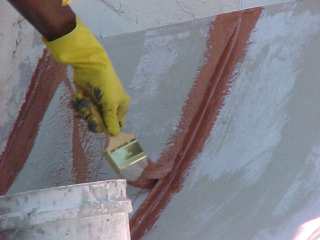
As the photos below illustrate, the painting copper application is quite simple. Over the roofing area, wipe clean with a cloth. The suggested brush is a stiff one, but as sharp eyes will note, this homeowner used a cheapo version from a nearby paint store.
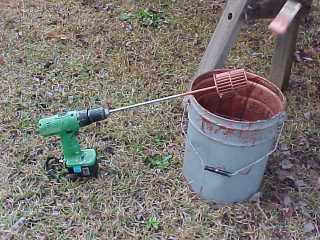
 The copper liquid does require some stirring. For a gallon pail, a stir stick suffices. This stirring insures the copper is evenly mixed into the urethane base. Just coat or paint over the surface, working the material into the roof. This copper liquid was designed for roofing work; therefore, if there are pinholes or other small breaks, this materials plugs these potential leaks. Two coatings are recommended.
 A question you may ask is, "How can I keep the bright copper look and stop the change to a patina?" The answer is the patina will take years to start to appear. The copper liquid darkens, as does standard copper sheets, then ages.
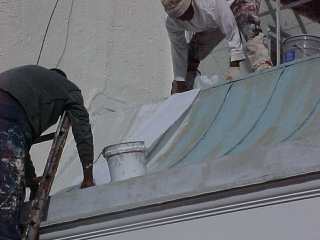
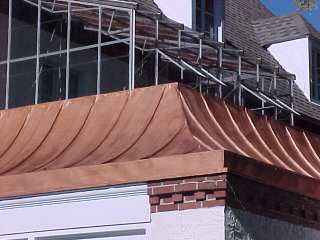
My familiarity with copper paint is my crew's application on roofing projects. Most of the times the material is applied to a window bay or another small roof. Every once in a while we encounter a larger project where the owneres are seeking restoration work on a damaged copper roof. Below is a summary of such a project.
With the use of the copper liquid coating embedded in mesh, this owner avoided the expense of removing the existing patina-aged copper roof and installing a replacement roof. Here are the photos, illustrating each step in this process of restoring aging copper sheets that leaked began to leak.

The copper sheets that comprise the roof over the dining room and were the floor for a greenhouse just needed attention.
Once the foundation of the fully reinforced application is completed and allowed to cure, the next step is the first coat of copper liquid coating
After curing, the panels are ready for the final coat
Prepping instructions: All surfaces to be treated must be clean, dry and free of loose debris that may interfere with proper bond.
Surfaces that have previously been coated should be examined carefully and tested for adhesion to the substrate. This can be accomplished by applying a strip of scotch tape to the coated surface. The tape should be thoroughly pushed into full contact and then pulled away at a 90° angle. Observe the adhesive surface for any dislodged coating particles.
If the tape has pulled away a significant quantity of coating, or if it has loosened the coating from the substrate, the coating should be removed. Loose coating should be thoroughly removed by abrasion, water jetting or other available technique.
Copper liquid paint is applied straight out of the can after 2 minutes of low speed mechanical stirring. Apply the product using brush, roller. or airless spray technique. The product should be applied in 2 coats at an overall rate of 50 square feet per gallon, achieving a wet film thickness of 30 mils or 15 mils per coat.